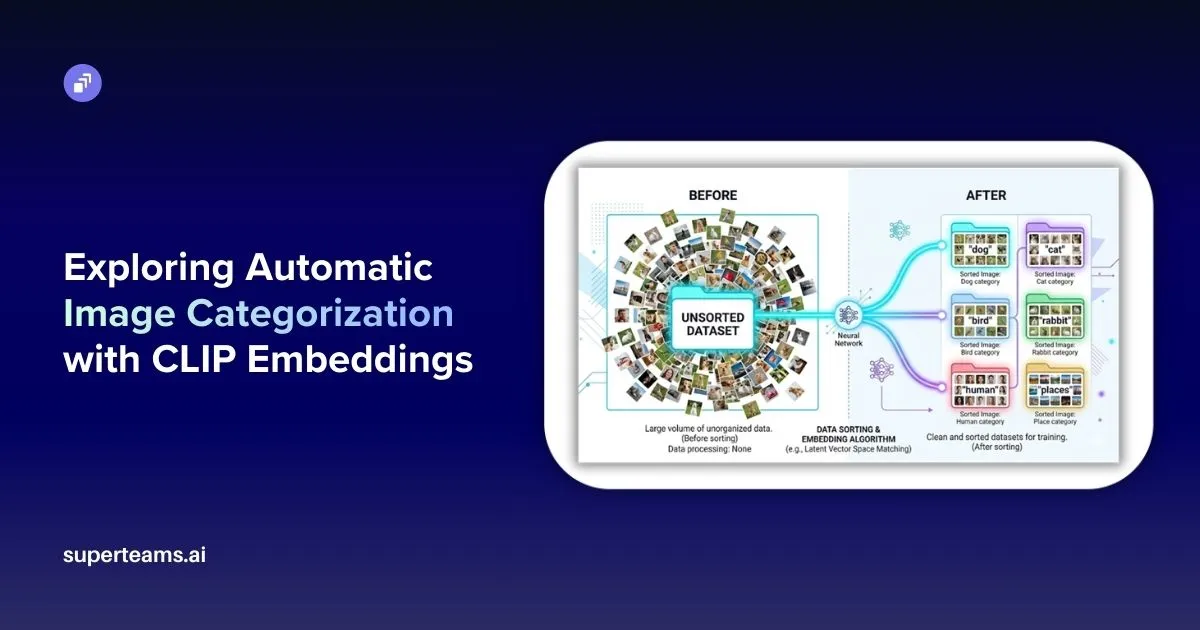
Managing large image datasets is one of those problems that sounds simple until you are actually dealing with it. When you have hundreds or thousands of images stored in a single folder with no structure, organizing them manually takes a lot of time and effort. This article walks through a Python-based pipeline that solves exactly this problem — it groups images by what they look like and automatically figures out what each group should be called, without any manual labeling.
The pipeline is built on top of a model called CLIP, and understanding what CLIP does is key to understanding how the whole system works.
What is CLIP?
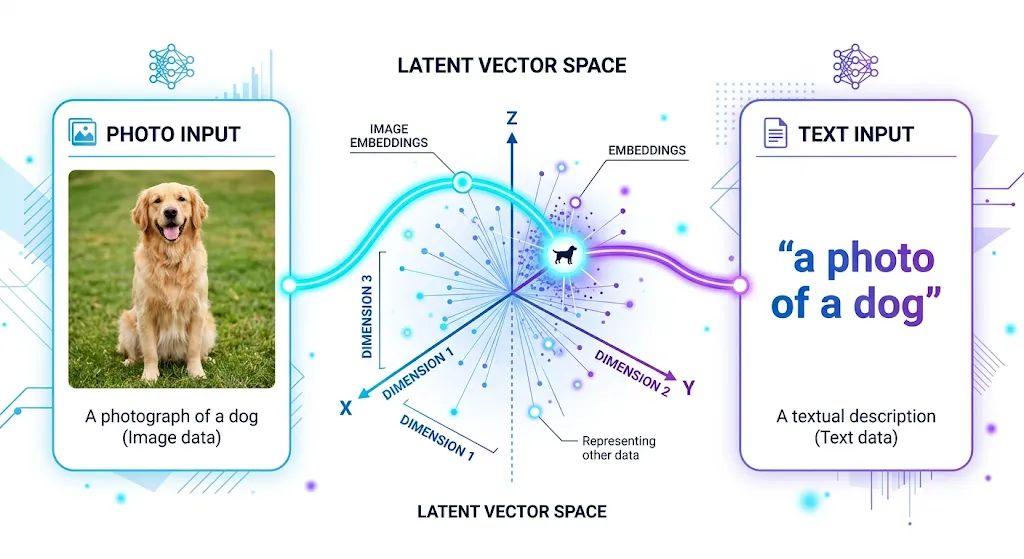
CLIP stands for Contrastive Language–Image Pretraining. It was developed by OpenAI and released in 2021. Unlike traditional image recognition models that are trained to identify a fixed set of categories, CLIP was trained on 400 million image and text pairs collected from the internet. Through this training, the model learned to connect visual content with the words people use to describe it.
The result is a model that understands both images and text in the same framework. It converts both into numerical vectors — called embeddings — and places them in a shared space. When an image and a text description are about the same thing, their embeddings end up close together in this space. When they are about different things, they end up far apart.
This shared understanding is what makes CLIP genuinely useful for classification tasks. There is no need to retrain it or provide labeled examples. It already carries a broad knowledge of visual concepts from its training, and that knowledge can be used directly.
How the Pipeline Works
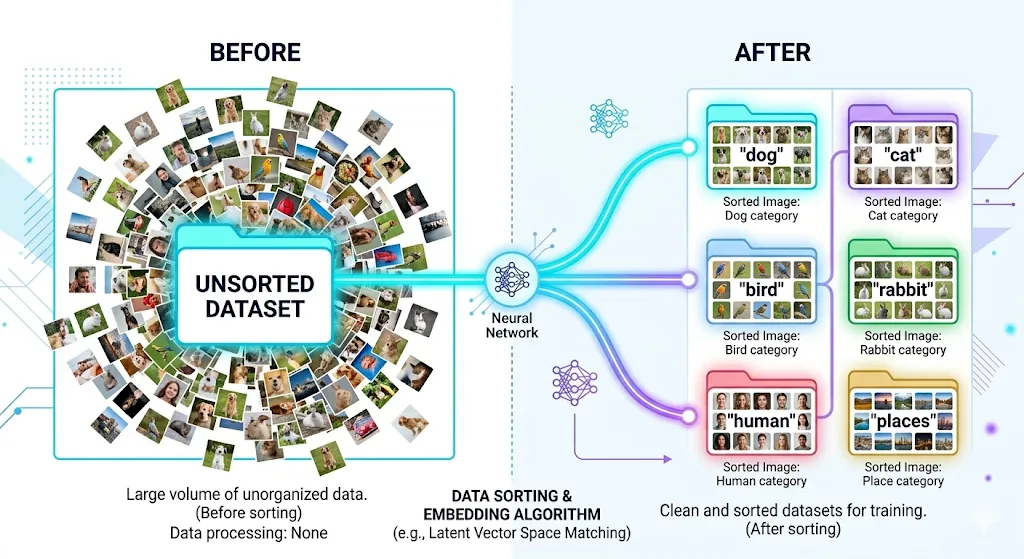
The pipeline takes a folder of mixed, unlabeled images and produces a set of named subfolders, each containing images of the same category. It does this in three stages.
In the first stage, every image is passed through CLIP’s vision encoder, which converts it into a 512-dimensional numerical vector. These vectors capture the semantic content of each image — not just the raw pixels, but what the image actually represents.
In the second stage, all the vectors are grouped using K-Means clustering. Images with similar vectors naturally cluster together because CLIP embeddings carry meaning. A photo of a labrador and a photo of a poodle will have vectors that point in roughly the same direction, so they end up in the same cluster.
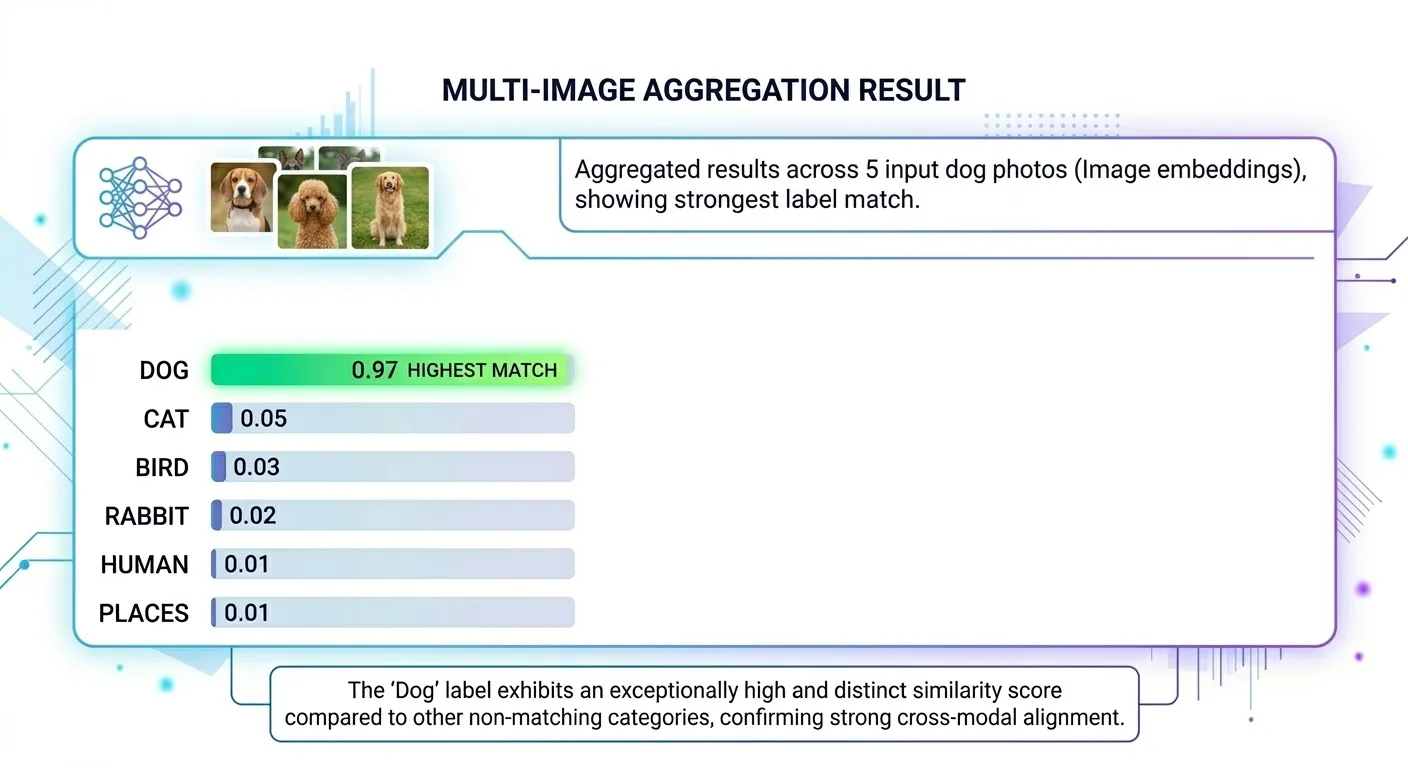
In the third stage, the pipeline uses CLIP’s text encoder to name each cluster. It compares sample images from each cluster against a list of candidate labels like “dog”, “cat”, “bird”, “human”, and “places”. Whichever label produces the highest similarity score becomes the name of that cluster’s folder.
The output is a clean, organized directory where every folder has a meaningful name and every image is in the right place.
The Full Pipeline
Here is how every stage connects from start to finish.

Stage One — Encoding the Images
The script walks through every file in the dataset folder. For each image it finds, it opens it, preprocesses it, and runs it through the CLIP model.
model, preprocess = clip.load("ViT-B/32", device=device)

for root, dirs, files in os.walk(dataset_path):
    for file in files:
        path = os.path.join(root, file)
        image = preprocess(Image.open(path)).unsqueeze(0).to(device)
        with torch.no_grad():
            features = model.encode_image(image)
        features = features / features.norm(dim=-1, keepdim=True)
        image_paths.append(path)
        image_features.append(features.cpu().numpy()[0])
The preprocessing step resizes and color-normalizes each image to match the format CLIP was trained on. The encode_image call returns a 512-dimensional vector for each image. That vector is then divided by its own length, a step called L2 normalization, which ensures all vectors are on the same scale, making them easier to compare later.
Files that are not valid images are skipped automatically without interrupting the process.
Stage Two — Clustering With K-Means
Once all the images have been encoded, the vectors are stacked into a matrix and passed to K-Means.
image_features = np.array(image_features)
kmeans = KMeans(n_clusters=num_clusters, random_state=42)
labels = kmeans.fit_predict(image_features)
K-Means begins by placing six center points at random positions in the 512-dimensional space. It then assigns each image vector to its nearest center, moves each center to the average position of all its assigned vectors, and repeats this process until the assignments stop changing. The result is six groups, each containing images that are close to each other in embedding space.
Because CLIP embeddings capture semantic meaning rather than just visual appearance, this grouping tends to be semantically coherent. Images of similar subjects cluster together because they produce similar vectors from the outset.

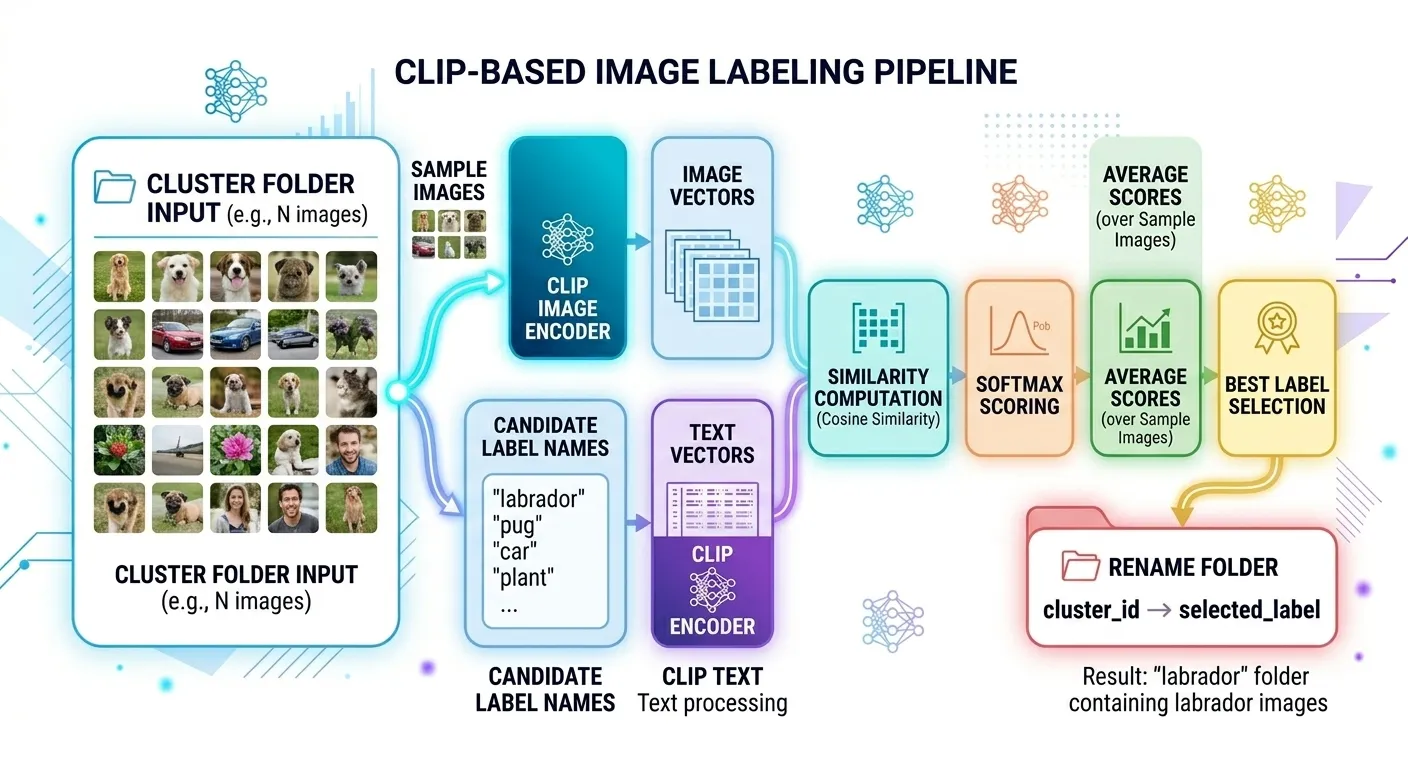
Stage Three — Naming the Clusters
After clustering, each group has a number but no name. This stage uses CLIP’s text encoder to assign meaningful labels.
candidate_labels = ["dog", "cat", "rabbit", "bird", "human", "places"]
text_tokens = clip.tokenize(candidate_labels).to(device)

with torch.no_grad():
    text_features = model.encode_text(text_tokens)

text_features = text_features / text_features.norm(dim=-1, keepdim=True)
Each candidate label is converted into a 512-dimensional text vector using the same CLIP model. For each cluster, five sample images are selected and their vectors are compared against all six text vectors.
similarity = (image_feature @ text_features.T).softmax(dim=-1)The dot product between an image vector and a text vector measures how aligned they are. Softmax converts all scores into a comparable format. The label with the highest average score across the five sampled images is assigned as the cluster name, and the folder is renamed accordingly.
This is called zero-shot classification — no examples were ever provided to teach the model what a “dog” or a “cat” looks like. CLIP already has that understanding built in from its original training.
Before and After
Before running the pipeline, the dataset looks like this:
dataset/
├── photo_001.jpg
├── photo_002.jpg
├── photo_003.jpg
├── photo_004.jpg
└── photo_005.jpg  ... and hundreds more
After running it, the output looks like this:
cluster_output/
├── dog/
├── cat/
├── bird/
├── rabbit/
├── human/
└── places/
Every image is sorted and every folder has a meaningful name.
Things to Consider When You Use This Pipeline
Match your candidate labels to your dataset. CLIP can only choose from the labels you give it. If your images include cars but you leave out “car,” the model will still force those images into the closest available category, even if that label is wrong. Before you run the pipeline, check and update the label list carefully.
Adjust the number of clusters based on your data. Six clusters may work well for a mixed dataset with six broad themes, but that will not hold true in every case. If your dataset is larger and more diverse, you will likely need more clusters. If your images are visually similar, fewer clusters usually work better.
Duplicate cluster names are handled automatically. You do not need to worry if two clusters end up with the same label. The pipeline renames the second folder automatically — for example, you may see folders like dog and dog_3 instead of a naming conflict.
Use a GPU if you can. The pipeline will still run on a CPU, but encoding takes much longer on large image sets. If you are working with a sizable dataset, GPU support will make a noticeable difference.
Project Link
You can explore the full project on GitHub.
At Superteams, we help you build AI agents customized to your business needs. To learn more, speak to us.


-Feature-Image.CjBFdO7y_Z1bTNvg.webp)